마틴 파울러가 알려주는 ChatGPT와 페어 프로그래밍 하는 법
[한국어 번역] An example of LLM prompting for programming by Martin Fowler

Refactoring(리팩토링)의 저자로 유명한 마틴 파울러(Martin Fowler)가 블로그에 작성한 An Example of LLM Prompting for programming 이라는 글을 한국어로 번역해 보았습니다. 한국어 독자의 이해를 돕기 위해 역자의 해석에 기반하여 문맥을 추가했음을 양지하여 주시기 바랍니다.
(역자) 마틴 파울러는 ThoughtWorks China의 테크 리드인 Xu Hao와의 대화하며 ChatGPT를 활용하여 페어 프로그래밍하는 방법에 대해 이야기를 나눴다고 하는데요. Xu Hao의 프롬프트는 LLM과 대화를 시작하기 위하여 답변에 꼬리물기(Chain of Thought) 전략을 활용한다고 합니다. 또한 그 프롬프트는 LLM한테 코드를 직접 달라고 하기보다는 어떻게 테스트 코드를 구현할 수 있을 것인가를 물어본다고 합니다. 이 과정을 통해서 계획이 세워지면, 그제서야 구현을 구체화하고 코드를 작성한다고 합니다.
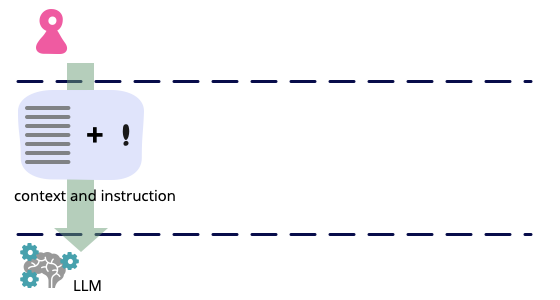
1단계: 내가 풀고자 하는 문제와 맥락 (General Knowledge) 알려주기
최근에 저는 Xu Hao와 Zoom 콜을 했는데, 자신이 ChatGPT를 이용해서 Self Testing Code를 작성했던 경험에 대해서 이야기를 해주었습니다. 그는 자신에게 맞는 GPT 사용법을 소개해주었습니다. Hao 님은 자신이 테스트하고자 하는 애플리케이션에 대해 그 맥락을 설명하고, 어떻게 코드가 설계되었으면 좋겠는지를 설명하는 프롬프트로 대화를 시작했습니다.
Prompt:
The current system is an online whiteboard system. Tech stack: typescript, react, redux, konvajs and react-konva. And vitest, react testing library for model, view model and related hooks, cypress component tests for view.
All codes should be written in the tech stack mentioned above. Requirements should be implemented as react components in the MVVM architecture pattern.
There are 2 types of view model in the system.
1. Shared view model. View model that represents states shared among local and remote users.
2. Local view model. View model that represents states only applicable to local user.
Here are the common implementation strategy:
1. Shared view model is implemented as Redux store slice. Tested in vitest.
2. Local view model is implemented as React component props or states (by useState hook), unless for global local view model, which is also implemented as Redux store slice. Tested in vitest.
3. Hooks are used as the major view helpers to retrieve data from shared view model. For most the case, it will use ‘createSelector’ and ‘useSelector’ for memorization. Tested in vitest and react testing library.
4. Don’t dispatch action directly to change the states of shared view model, use an encapsulated view model interface instead. In the interface, each redux action is mapped to a method. Tested in vitest.
5. View is consist of konva shapes, and implemented as react component via react-konva. Tested in cypress component tests.
Here are certain patterns should be followed when implement and test the component
1. When write test, use
describeinstead oftest2. Data-driven tests are preferred.
3. When test the view component, fake view model via the view model interface6) Awareness Layer
Requirement: Display other users’ awareness info(cursor, name and online information) on the whiteboard.
AC1: Don’t display local user
AC2: When remote user changes cursor location, display the change in animation.
Provide an overall solution following the guidance mentioned above. Hint, keep all awareness information in a Konva layer, and an awareness info component to render cursor, and name. Don’t generate code. Describe the solution, and breaking the solution down as a task list based on the guidance mentioned above. And we will refer this task list as our master plan.
(역자 주) 위 프롬프트에 대한 한국어 번역을 소개하겠습니다.
프롬프트:
현재 제가 만들고 있는 온라인 화이트보드 시스템에 대해 소개하겠습니다. 저는 테크스택으로 TypeScript, React, Redux, KonvaJS, React-Konva를 사용하고 있습니다. 테스팅 라이브러리로는 vitest를 사용해서 View Model과 View에 관련된 Hooks 메소드를 테스트합니다. View 컴포넌트 테스트로는 Cypress를 사용하고 있습니다.
모든 코드는 위에 이야기한 테크 스택 만을 사용해야 합니다. 모든 요구사항은 MVVM 아키텍처 패턴을 따라서 리액트 컴포넌트를 이용하여 구현해야 합니다.
저의 프로그램에는 두 경우의 뷰 모델이 있어요.
첫 번째로는 공유되는 뷰 모델인데요. 로컬 유저(사용자 본인을 의미)와 리모트 유저 (화이트보드를 사용하는 본인 제외 다른 사용자를 의미) 간에 상태가 서로 공유되는 뷰 모델을 뜻합니다.일반적인 테스트 구현 전략은 다음과 같아요.
1. 먼저 공유되는 뷰 모델은 Redux 스토어에서 Slice로 구현하고, vitest로 테스트를 진행해요.
2. 로컬 뷰 모델은 React 컴포넌트에서 props 또는 state로 관리되는데, 주로 useState Hook을 사용합니다. 만약 Global Local View 모델이면 1번의 경우처럼 리덕스 스토어 슬라이스로 구현합니다. 이것 역시 vitest로 테스트를 진행합니다.
3. Hook은 공유되는 뷰 모델에서 데이터를 가져오는데 중요하게 사용되는 유틸 메소드인데, 대부분의 경우 createSelector나 useSelector를 메모이제이션을 위해 사용합니다. 역시 vitest와 react testing library를 사용해서 테스트를 진행합니다.
4. 공유되는 뷰 상태의 모델을 변경하기 위해 액션을 직접 디스패치 하지 마세요. 대신 뷰 모델의 캡슐화된 인터페이스를 대신 사용하길 바래요. 인터페이스에서는 각 리덕스 액션이 메소드와 매핑되어 있습니다. 이것 역시 vitest로 테스트가 되었습니다.
5. View는 konva shapes로 만들어졌고, react-konva 라이브러리를 사용해서 리액트 컴포넌트가 되었다고 합니다. cypress로 테스트 하였습니다.컴포넌트를 구현하고 이를 테스트하기 위해서 다음 패턴을 준수해주세요.
1. 테스트를 작성할 때test대신describe를 사용해주세요.
2. 데이터 기반의 테스트를 선호합니다.
3. 뷰 컴포넌트를 테스트할 때는, 뷰 모델의 인터페이스를 사용해서 뷰 모델을 모킹해주세요.테스트 요구사항
요구사항: 화이트보드에 다른 사용자들이 어디에 클릭하고 무엇을 보고 있는지, 그리고 그 사용자가 현재 접속 중인지를 알려주세요.
테스트 케이스 1: 나의 정보는 표시하지 않는다.
테스트 케이스 2: 다른 사람이 클릭하고 있는 위치가 바뀌면, 그 바뀐 위치를 애니메이션으로 표현한다.위에서 언급한 가이드에 따라 전반적인 솔루션을 제공해주세요. 다음은 힌트인데요, 다른 사용자에 대한 모든 커서 등의 정보는 Konva 레이어에 담겨있어야 합니다. AwarenessInfo 컴포넌트는 커서 위치와 커서 이름을 렌더링해야 합니다.
구현 방법에 대해 설명하고, 위에서 언급한 가이드에 따라 구현 방법을 할 일 목록 형태로 나누어주세요.
프롬프트가 진짜 기네요. 그래서 Xu Hao님은 몇 가지 중요한 포인트를 찝어주셨어요. 지금 프롬프트를 보면 일반적인 프로그램의 예시를 설명하고 있다고 보여지네요. ChatGPT를 사용할 때 한 가지 주의할 점이 있다면, 비밀로 유지되어야 하는 실제 프로덕션 코드를 절대 넣어서는 안된다는 사실입니다. 만약 코드를 직접 입력할 경우 보안 문제가 발생할 수 있기 때문입니다. 비즈니스 정책이나 실제 프로덕션 코드는 절대 ChatGPT와 대화를 나눌 때 입력해서는 안됩니다.
Xu Hao님이 사용한 대부분의 프롬프트는 ChatGPT가 따라야 하는 코드의 가이드라인을 알려준 것입니다. Hao님은 ChatGPT에 프롬프트를 입력해서 결과를 살펴본 다음에 그가 원하는 스타일로 코딩하도록 기존의 프롬프트를 개선했지요. 만약 컨텍스트를 계속 기억하게 할 수 있다면, ChatGPT 세션을 새로 만들 때마다 이 프롬프트를 계속 재사용해서 다른 팀원들에게 공유할 수도 있겠습니다.
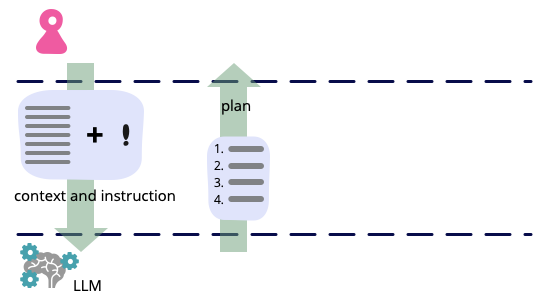
자, 우리의 목적은 코드를 작성하고 테스트를 만드는 것이기는 해요. 하지만 위의 제약사항에서 지금 당장은 “코드를 작성하지 말아주세요.” 라고 하는 내용이 있었지요? 현 시점에서 그는 ChatGPT를 이용해서 코드를 작성하기 전에 어떤 계획을 가지고 접근을 할 것인가에 대해서 이야기를 나누고자 합니다. 우리는 이러한 접근법을 Generated Knowledge라고 부릅니다.
아마 사람들이 일반적으로 GPT를 사용하는 방식은 먼저 자기가 풀려고 하는 문제에 대해 알려준 다음에, 이 문제를 해결하는 방법에 대해 직접 코드로 주건 아니면 말로 어떻게 문제를 풀면 되는지를 설명해주건, 하여간 알려달라고 할 거에요. 하지만 우리가 Generated Knowledge라는 방법을 이용해서 몇 가지 단계로 나누어 대화를 이끌어가보는 거에요. 먼저 GPT한테 문제를 풀 때 꼭 알아야 하는 필수적인 정보에 대해 알려달라고 부탁한 다음에, 사용자는 GPT가 생성한 정보에 대해 피드백을 주면서 최종적으로는 GPT가 코드까지 작성하도록 부탁하는 것입니다.
2단계: 꼬리 질문하기 (Chain of Thoughts)
제가 Xu Hao님이 작성한 프롬프트를 보면서 다음과 같이 프롬프트를 구성한 점이 가장 인상적이었습니다.
- 지시 내리기: GPT가 따라야 하는 기본적인 안내사항에 대해서 설명합니다.
- 꼬리 질문하기: GPT한테 왜 그렇게 생각했습니까? 를 설명하도록 물어보기

Xu Hao님은 GPT가 생성한 코드에 대해 꼬리질문을 던지기 위하여 GPT가 따라야 하는 요구사항에 대해서도 프롬프트를 작성했습니다. 그리고 ChatGPT가 사용자와 꼬리 질문을 주고 받으면서 피드백한 사항을 바탕으로 할 일 목록에 대해 작성하도록 지시했습니다.
자, 이제 ChatGPT가 어떻게 답변했는지 살펴봅시다.
Solution:
To implement the awareness layer feature, we can follow the guidelines mentioned in the problem statement and use the existing tech stack.
Task List:
1. Create a new component named “AwarenessInfo” to render cursor and name for remote users.
2. Create a new Konva layer to hold all the “AwarenessInfo” components.
3. Add the Konva layer to the main whiteboard component.
4. Create a new Redux slice to store the awareness information for remote users.
5. Create an encapsulated view model interface for the awareness Redux slice.
6. Implement the “AwarenessInfo” component to retrieve and display the awareness information for each remote user from the view model.
7. Implement a method in the encapsulated view model interface to update the awareness information for each remote user.
8. When a remote user changes the cursor location, dispatch the update method in the encapsulated view model interface to update the corresponding awareness information.
9. In the “AwarenessInfo” component, use the new location to animate the cursor change.
10. Write tests for the new “AwarenessInfo” component, including data-driven tests to ensure it properly displays the awareness information for all remote users.
11. Write tests for the encapsulated view model interface to ensure it properly updates the awareness information for remote users.
12. Write end-to-end Cypress tests to ensure the awareness layer is properly displayed and updated when remote users change their cursor location.
13. By following these tasks, we can implement the awareness layer feature in the online whiteboard system.
(역자 주) 다음은 한국어로 번역한 답변입니다.
해결 방법:
요구사항을 구현하기 위하여 앞서 이야기한, 해결해야 하는 문제와 테크 스택을 따라야 할 것입니다.
할 일 목록:
1. AwarenessInfo 라는 이름의 컴포넌트를 새로 작성합니다. 해당 컴포넌트는 커서 정보와 커서 이름을 렌더링합니다.
2. 새로운 Konva 레이어를 만듭니다. 해당 레이어는 AwarenessInfo 컴포넌트를 모두 들고 있게 합니다.
3. 화이트보드 메인 컴포넌트에 앞서 만든 Konva 레이어를 추가합니다.
4. 새로운 Redux Slice를 만들어 본인을 제외한 다른 사용자들(remote users)이 가지고 있는 커서와 이름 정보를 저장하도록 합니다.
5. 위에서 만든 Redux Slice를 은닉할 수 있는 새로운 뷰 모델 인터페이스를 만듭니다.
6. AwarenessInfo 컴포넌트에 뷰 모델에 있는 다른 사용자들이 가지고 있는 커서와 이름 정보를 가져오고 그 정보들을 화면에 표시할 수 있도록 로직을 구현합니다.
7. AwarenessInfo 컴포넌트에 다른 사용자들의 커서와 이름 정보를 업데이트할 수 있도록 하는 내부 로직도 구현해줍니다.
8. 만약 다른 사용자가 마우스 커서를 움직일 때는 뷰 모델 인터페이스의 update 메소드를 dispatch 해서 이에 따라 정보가 새롭게 업데이트 될 수 있도록 로직을 구현합니다.
9. AwarenessInfo 컴포넌트에서는 커서가 바뀔 때 새로운 커서 위치를 사용해서 애니메이션으로 나타냅니다.
10. AwarenessInfo 컴포넌트에 대한 테스트를 작성합니다. 이 때는 모든 다른 사용자들의 커서 정보가 정상적으로 화면에 표시되는 지를 데이터 기반의 테스트 방법으로 기능을 검증합니다.
11. 다른 사용자들이 마우스 커서를 움직였을 때, 뷰 모델 인터페이스가 이를 정상적으로 업데이트 하는 지에 대한 테스트 코드도 작성합니다.
12. 마지막으로, Cypress를 사용해서 통합 테스트를 작성합니다. 이 때 테스트는 외부 사용자가 마우스 커서를 움직였을 때 그 정보가 정상적으로 업데이트 되면서 동시에 화면에서 정상적으로 나타나는지까지 검증해야 합니다.
위 방식을 따라서 새로운 기능을 온라인 화이트보드 시스템에 구현할 수 있습니다.
ChatGPT가 만들어주는 답변은 결정적이지 않기 때문에 답변은 그 때 그 때 바뀝니다. 그래서 위에서 제시한 GPT의 답변은 다시는 나오지 않을 거에요. 만약 당장 이 글을 읽고 계시는 여러분이 프롬프트를 그대로 복사해서 GPT에게 물어보면 답변이 다르게 나올 겁니다.
가장 중요한 점은 GPT가 할 일 목록을 구현해야 하는 순서대로 나열했다는 것입니다. 이제 우리는 ChatGPT와 대화가 끝날 때까지 (세션이 종료될 때까지) 할 일 목록을 몇 번 이렇게 알려줄 수 있습니다. 만약 11번 할 일 목록에 대해 말해줘 라고 하면, Cypress를 사용해서 통합 테스트를 작성합니다. 라는 내용을 GPT가 기억하는 것이지요.
Hao님은 할 일 목록을 이제 쭉 살펴보고 이게 말이 되는 소리인지를 살펴볼 수 있습니다. 만약 GPT가 답변한 할 일 목록에 무엇인가 좀 수정해야 하거나 궁금한 점이 있다라고 하면 ChatGPT한테 몇 번 몇 번 할 일을 다시 이렇게 작성해주세요 라고 하거나 아니면 새로운 정보를 계속 주면서 할 일 목록 자체를 처음부터 다시 작성해주세요 라고 얘기할 수 있는 겁니다.
예를 하나 들어볼까요? 지금 위에서 GPT가 답변한 내용을 살펴보면 컴포넌트의 유형에 따라 구현해야 하는 내용이 분명 달라져야 하는 데 그렇게 답변을 해주고 있지는 않네요. 그래서 다음과 같이 새롭게 부탁을 해보겠습니다.
Prompt:
Rewrite the master plan, and group tasks as model, view model and view.
할 일 목록을 새로 짜줘. 할 일들은 모델, 뷰 모델, 그리고 뷰에 따라 태스크를 묶어서 알려주라.
이렇게 GPT랑 피드백을 주고 받으면서 처음에 구상했던 아키텍처에 맞게 할 일 목록을 작성해갈 수 있답니다. 이 방식은 처음 프롬프트를 넣을 때부터 정확한 답변을 한 번에 받기 위해 사용할 수 있는데요.
할 일을 모델, 뷰 모델, 그리고 뷰에 따라 태스크를 묶어서 알려달라는 내용이 처음 프롬프트에는 담겨있지는 않았어서, 그 후에 대화를 통해 추가를 했군요. 만약 처음 프롬프트에 바로 지시를 내리고 싶다면 (아마도) 4번 항목에 추가를 할 수 있겠군요.
3단계: 컴포넌트 이름을 지어줘!
자 이제 여러분이 생각했을 때 GPT가 짜준 할 일 목록이 마음에 든다고 칩시다! 이제 각각 할 일 목록마다 컴포넌트 이름을 좀 지어달라고 부탁할 겁니다.
Prompt:
Rewrite the master plan, this time with detailed component names, methods, and props
좋았어! 할 일 목록을 다시 작성해줘. 이번에는 컴포넌트와 메소드 그리고 props 이름을구체적으로 작성해줘.
다음은 ChatGPT가 내놓은 답변입니다.
Sure, here’s a revised master plan with detailed component names, methods, and props:
Task List:
Create a new component named “AwarenessInfo” to render cursor and name for remote users. This component will receive props such as user name, cursor position, and online status.
Create a new Konva layer named “AwarenessLayer” to hold all the “AwarenessInfo” components.
Add the “AwarenessLayer” to the main whiteboard component.
Create a new Redux slice named “awareness” to store the awareness information for remote users.
Create an encapsulated view model interface named “AwarenessViewModel” for the “awareness” Redux slice. This interface will contain a method named “updateUserAwarenessInfo” to update the awareness information for each remote user.
Implement the “AwarenessInfo” component to retrieve and display the awareness information for each remote user from the view model. The component will use the “useSelector” hook to retrieve the relevant information.
Implement the “updateUserAwarenessInfo” method in the “AwarenessViewModel” interface to dispatch a Redux action to update the awareness information for each remote user. This method will be called by the “MainWhiteboard” component.
When a remote user changes the cursor location, dispatch the “updateUserAwarenessInfo” method in the “AwarenessViewModel” interface to update the corresponding awareness information.
In the “AwarenessInfo” component, use the new location to animate the cursor change. This can be accomplished using the Konva “Tween” animation.
Write tests for the new “AwarenessInfo” component, including data-driven tests to ensure it properly displays the awareness information for all remote users. The tests will be written using the React Testing Library.
Write tests for the encapsulated view model interface to ensure it properly updates the awareness information for remote users. These tests will use the Vitest framework.
Write end-to-end Cypress tests to ensure the awareness layer is properly displayed and updated when remote users change their cursor location. The tests will simulate user interactions with the whiteboard and verify the state of the “AwarenessLayer” and “AwarenessInfo” components.
(역자 주) 다음은 한국어 번역입니다.
좋습니다! 메소드와 컴포넌트 그리고 props의 이름을 지어서 새롭게 답변해보도록 하겠습니다.
1.
AwarenessInfo라는 이름의 컴포넌트를 새로 작성합니다. 해당 컴포넌트는 커서 정보와 커서 이름, 그리고 현재 접속 중인지에 대한 정보도 렌더링합니다.2. 새로운 Konva 레이어를 만듭니다. 레이어 이름은
AwarenessLayer입니다. 해당 레이어는AwarenessInfo컴포넌트를 모두 들고 있게 합니다.3. 화이트보드 메인 컴포넌트에 앞서 만든 Konva 레이어를 추가합니다.
4. 새로운 Redux Slice를 만들어 본인을 제외한 다른 사용자들(remote users)이 가지고 있는 커서와 이름 정보를 저장하도록 합니다. Slice 이름은
awareness입니다.5. 위에서 만든 Redux Slice
awareness를 은닉할 수 있는 새로운 뷰 모델 인터페이스를 만듭니다. 인터페이스의 이름을AwarenessViewModel라고 짓습니다. 해당 인터페이스는updateUserAwarenessInfo라는 이름의 메소드를 가지고 있습니다. 해당 메소드는 다른 사용자들의 정보를 업데이트하는 역할을 합니다.6.
AwarenessInfo컴포넌트에 뷰 모델에 있는 다른 사용자들이 가지고 있는 커서와 이름 정보를 가져오고 그 정보들을 화면에 표시할 수 있도록 로직을 구현합니다. 해당 로직을 구현하는 컴포넌트는 정보를 가져오기 위하여useSelectorHook을 사용합니다.7.
AwarenessViewModel인터페이스에updateUserAwarenessInfo메소드를 구현하여 다른 사용자의 정보를 업데이트하는 Redux Dispatch Action을 만듭니다.MainWhiteboard컴포넌트가updateUserAwarenessInfo메소드를 호출할 것입니다.8. 만약 다른 사용자가 마우스 커서를 움직일 때는
AwarenessViewModel인터페이스의updateUserAwarenessInfo메소드를 dispatch 합니다.9.
AwarenessInfo컴포넌트에서는 커서가 바뀔 때 새로운 커서 위치를 사용해서 애니메이션으로 나타냅니다. 해당 요구사항은 Konva의Tween이라는 애니메이션을 활용하여 구현합니다.10.
AwarenessInfo컴포넌트에 대한 테스트를 작성합니다. 이 때는 모든 다른 사용자들의 커서 정보가 정상적으로 화면에 표시되는 지를 데이터 기반의 테스트 방법으로 기능을 검증합니다. 이 때 React Testing Library를 활용하여 검증합니다.11. 다른 사용자들이 마우스 커서를 움직였을 때, 은닉된 뷰 모델 인터페이스가 이를 정상적으로 업데이트 하는 지에 대한 테스트 코드도 작성합니다. 이 때 vitest를 이용하여 검증합니다.
12. 마지막으로, Cypress를 사용해서 통합 테스트를 작성합니다. 이 때 테스트는 외부 사용자가 마우스 커서를 움직였을 때 그 정보가 정상적으로 업데이트 되면서 동시에 화면에서 정상적으로 나타나는지까지 검증해야 합니다. 해당 테스트는 사용자의 화이트보드와의 인터랙션 전반을 시뮬레이션 하고 이에 따른
AwarenessLayer와AwarenessInfo컴포넌트의 상태를 검증해야 합니다.
4단계: 이제 코드를 작성해줘!
자 좋습니다. 위의 방식에 따라 이제 우리는 할 일 별로 코드를 작성해달라고 ChatGPT에게 부탁할 수 있게 되었군요!

다음은 프롬프트 예시입니다.
Prompt:
provide me example tests and implementation for the awareness slice and AwarenessViewModel. Test first.
좋았어! 이제
AwarenessSlice와AwarenessViewModel을 구현한 기능과 테스트 코드를 작성해줘. 먼저 테스트 코드부터 작성해줘.
다음은 ChatGPT의 답변입니다.
Sure, let's start with writing tests for the awareness slice and AwarenessViewModel:

Test for Awareness Slice:

describe('awareness slice', () => {
  let store: MockStore;
  beforeEach(() => {
    store = configureMockStore()(initialState);
  });

  it('should set the cursor location', () => {
    store.dispatch(setCursorLocation({ x: 100, y: 200 }));
    const state = store.getState().awareness;
    expect(state.cursorLocation).toEqual({ x: 100, y: 200 });
  });

  it('should set the name', () => {
    store.dispatch(setName('John Doe'));
    const state = store.getState().awareness;
    expect(state.name).toBe('John Doe');
  });

  it('should set the online status', () => {
    store.dispatch(setOnline(true));
    const state = store.getState().awareness;
    expect(state.isOnline).toBe(true);
  });
});
Test for AwarenessViewModel:

describe('AwarenessViewModel', () => {
  let store: MockStore;
  let awarenessViewModel: AwarenessViewModel;
  beforeEach(() => {
    store = configureMockStore()(initialState);
    awarenessViewModel = new AwarenessViewModel(store);
  });

  it('should set the cursor location', () => {
    awarenessViewModel.setCursorLocation({ x: 100, y: 200 });
    const state = store.getState().awareness;
    expect(state.cursorLocation).toEqual({ x: 100, y: 200 });
  });

  it('should set the name', () => {
    awarenessViewModel.setName('John Doe');
    const state = store.getState().awareness;
    expect(state.name).toBe('John Doe');
  });

  it('should set the online status', () => {
    awarenessViewModel.setOnline(true);
    const state = store.getState().awareness;
    expect(state.isOnline).toBe(true);
  });
});

Now, let's implement the Awareness slice and AwarenessViewModel:

Awareness slice:

interface AwarenessState {
  cursorLocation: { x: number; y: number };
  name: string;
  isOnline: boolean;
}

const initialState: AwarenessState = {
  cursorLocation: { x: 0, y: 0 },
  name: '',
  isOnline: false,
};

const awarenessSlice = createSlice({
  name: 'awareness',
  initialState,
  reducers: {
    setCursorLocation: (state, action: PayloadAction<{ x: number; y: number }>) => {
      state.cursorLocation = action.payload;
    },
    setName: (state, action: PayloadAction) => {
      state.name = action.payload;
    },
    setOnline: (state, action: PayloadAction) => {
      state.isOnline = action.payload;
    },
  },
});

export const { setCursorLocation, setName, setOnline } = awarenessSlice.actions;

export default awarenessSlice.reducer;
AwarenessViewModel:

class AwarenessViewModel {
  private store: Store;

  constructor(store: Store) {
    this.store = store;
  }

  setCursorLocation(cursorLocation: { x: number; y: number }) {
    this.store.dispatch(setCursorLocation(cursorLocation));
  }

  setName(name: string) {
    this.store.dispatch(setName(name));
  }

  setOnline(isOnline: boolean) {
    this.store.dispatch(setOnline(isOnline));
  }
}

Note: In this implementation, I assumed that the AwarenessViewModel is used to
set the values in the store. If it is also used to retrieve the values from the
store, we can add corresponding methods to the AwarenessViewModel class.

참고: 이 구현에서는 AwarenessViewModel을 사용하여 Redux Store 값을 새롭게 설정하는 데 사용된다고 가정했습니다.
해당 모델이 store에서 값을 가져오는 데에도 사용된다면, AwarenessViewModel 클래스에 해당 값을 가져오는 메서드를 추가할 수 있습니다.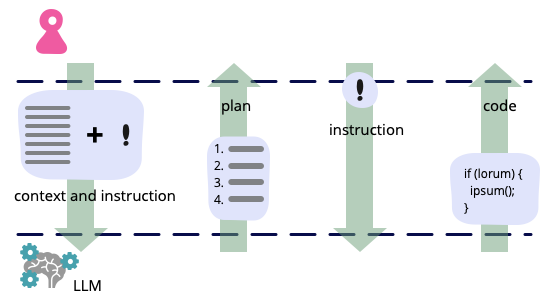
ChatGPT가 준 코드를 좀 살펴보니까 나쁘지도 않지만 그렇다고 완벽하지도 않습니다. 사실 이 코드를 그대로 복붙하면 동작하지는 않거든요. 이유는 간단한데요. 지금 ChatGPT가 작성한 코드는 redux-mock-store의 configureMockStore를 사용한다고 가정합니다. 그런데 우리가 앞서 정해 준 테크 스택에는 react-mock-store가 없어요. 그래서 Xu Hao님은 ChatGPT에게 몇 번 더 프롬프트를 주면서 다시 작성해달라고 부탁했습니다. 이번에는 react-mock-store에 의존성이 없어도 구현할 수 있게 바꾸어 보았습니다.
다음은 프롬프트 예시입니다.
Prompt:
rewrite the tests without redux-mock-store
redux-mock-store를 쓰지 않고 테스트를 다시 작성해줘.
Sure, here's an example implementation of the tests for the AwarenessViewModel and the awareness slice without using redux-mock-store:

import { createAwarenessSlice, AwarenessState, updateAwareness } from './awarenessSlice';
import { AwarenessViewModel } from './AwarenessViewModel';

describe('AwarenessViewModel', () => {
  const mockDispatch = jest.fn();
  const initialState: AwarenessState = {
    users: {
      'user1': {
        name: 'User 1',
        cursorPosition: { x: 0, y: 0 },
        online: true,
      },
      'user2': {
        name: 'User 2',
        cursorPosition: { x: 100, y: 100 },
        online: true,
      },
    },
  };
  let viewModel: AwarenessViewModel;

  beforeEach(() => {
    viewModel = new AwarenessViewModel(initialState, mockDispatch);
  });

  describe('getUserNames', () => {
    it('returns the list of user names', () => {
      const names = viewModel.getUserNames();
      expect(names).toEqual(['User 1', 'User 2']);
    });
  });

  describe('getCursorPosition', () => {
    it('returns the cursor position for a given user ID', () => {
      const cursorPosition = viewModel.getCursorPosition('user1');
      expect(cursorPosition).toEqual({ x: 0, y: 0 });
    });

    it('returns undefined for an unknown user ID', () => {
      const cursorPosition = viewModel.getCursorPosition('unknown');
      expect(cursorPosition).toBeUndefined();
    });
  });

  describe('updateCursorPosition', () => {
    it('dispatches the updateAwareness action with the new cursor position', () => {
      viewModel.updateCursorPosition('user1', { x: 50, y: 50 });
      expect(mockDispatch).toHaveBeenCalledWith(updateAwareness({
        user: 'user1',
        cursorPosition: { x: 50, y: 50 },
      }));
    });
  });
});
And here's an example implementation of the awarenessSlice without using redux-mock-store:

import { createSlice, PayloadAction } from '@reduxjs/toolkit';

export type CursorPosition = { x: number, y: number };

export type UserAwareness = {
  name: string;
  cursorPosition: CursorPosition;
  online: boolean;
};

export type AwarenessState = {
  users: Record<string, UserAwareness>;
};

const initialState: AwarenessState = {
  users: {},
};

const awarenessSlice = createSlice({
  name: 'awareness',
  initialState,
  reducers: {
    updateAwareness: (state, action: PayloadAction<{ user: string, cursorPosition: CursorPosition }>) => {
      const { user, cursorPosition } = action.payload;
      state.users[user].cursorPosition = cursorPosition;
    },
    setOnline: (state, action: PayloadAction<{ user: string, online: boolean }>) => {
      const { user, online } = action.payload;
      state.users[user].online = online;
    },
  },
});

export const { updateAwareness, setOnline } = awarenessSlice.actions;
export const awarenessReducer = awarenessSlice.reducer;

Note that since we're not using redux-mock-store,
we need to pass a mock dispatch function to the view model constructor,
and in the test for updateCursorPosition we need to check that
the correct action was dispatched using jest.fn().

번역: 이제는 redux-mock-store를 사용하지 않으므로,
뷰 모델 생성자에 모킹 디스패치 함수를 전달해야 합니다,
updateCursorPosition 메소드를 테스트할 때 jest.fn()를 사용하여
해당 Action이 dispatch 되었는지 확인해야 합니다.
좋아요, 대화를 통해서 ChatGPT에게 코드를 수정하도록 지시해 보았습니다. 수정을 조금 더 해보면서 코드를 리팩토링할 수 있는데요.
예를 들어서, 팀 내 테스트 코드 컨벤션을 맞추기 위해 다음과 같이 지시를 내려볼 수 있겠네요.
Prompt:
Use `configureTestingStore(‘awareness’, initialState)` to initialize the test store
테스트할 때 store를 초기화하기 위하여 configureTestingStore(‘awareness’, initialState) 를 사용해주세요.
여기에 컴포넌트 따위를 import 하는 상대 경로만 조금 수정하고, reducer 내용만 조금 더 수정을 가해주면 코드는 정상적으로 동작하더라구요. Xu Hao님은 위와 같이 ChatGPT와 대화를 나누면서 코드를 리팩토링하는 과정을 할 일 목록에 있는 모든 내용에 다 적용하면서 주어진 일을 끝마치더라구요.
단점: Token Limit 때문에 자꾸 앞서 이야기한 것을 까먹어요
앞서 소개한 ChatGPT와의 페어코딩 방식은 Token Limit이라고 하는 제약 때문에 대화를 계속 나누다보면 컨텍스트가 사라질 위험이 있습니다. 토큰 수 제약이 다 차버리게 되면 ChatGPT는 기억을 잃어버리는데요. 처음 대화의 내용부터 잊어버리기 시작합니다. 말 그대로 까먹는 거죠.
한 두번 짧게 대화하고 말 거면 이러한 문제가 나타나지는 않는데, 만약 큰 단위의 대화를 나누거나 컨텍스트를 다룰 일이 있다면 심각한 문제가 됩니다. ChatGPT는 조금씩 토큰 제한 갯수를 늘리고 있기는 하지만, GPT-4는 이 글을 번역하는 2023년 4월 27일 기준으로 8,192 단어 수의 제한이 있고 GPT-3.5-turbo는 32,768 단어 수의 토큰 제한이 있답니다.
이러한 토큰 제한이 다음과 같은 문제를 일으킨다고 하는데요.
- ChatGPT가 답변을 작성하다가 중간에 멈춰버립니다. 이 때는 “You are not finished” 혹은 “go on” 이라고 하면서 계속 해달라고 부탁하면 쉽게 해결되기도 합니다.
- 프롬프트 전체 사이즈 자체가 크면 ChatGPT는 fatal error를 내뿜는 경우가 있는데, 이러한 경우에는 대화 자체를 새롭게 시작해야 합니다.
하지만 그 무엇보다도 대화를 지속할 수록 ChatGPT가 앞서서 얘기한 과거 내용부터 잊어버리기 시작한다는 것이 문제입니다. 즉, 맥락을 잊어먹는 것이지요. 이 때는 까먹은 컨텍스트를 새롭게 알려줘야 하는데요. 우리가 앞서서 할 일 목록을 번호를 매겨달라고 한 것이 이 문제를 해결하는 데 도움이 됩니다. 만약 대화를 새롭게 시작하겠다고 한다면 최초 전략과 할 일 목록만 넣어준 다음에 자신이 원하는 할 일 번호의 코드를 작성해달라고 하면 토큰의 갯수를 아낄 수 있거든요.
Xu Hao님은 ChatGPT의 맥락에 자꾸 꼬리물기 식 대화를 이어나가는 것이 서로 다른 세션에서 대화를 나누더라도 원하는 답변을 얻어낼 수 있는 전략이라고 소개했습니다. 물론 서로 다른 세션에서 새롭게 코드 작성을 부탁할 때, ChatGPT에 몇 가지 추가사항도 함께 알려줘야 통일성 있는 코드를 알려준다고는 덧붙였습니다. 하지만 좌우지간 꼬리물기식 대화전략이 코드 작성에 매우 유용하다는 사실을 알게 되었습니다.
저 마틴 파울러는, ChatGPT에게 자신의 프로젝트 개요를 소개하고 해결하고자 하는 요구사항(General Knowledge)에 대해 구체적으로 설명해준 다음, 이러한 꼬리물기식 대화법(Chain of Thoughts)를 잘 이용하면 코딩할 때 매우 유용할 것이라고 생각합니다. 특히 LLM을 사용할 때, 더 좋은 결과물을 만들기 위하여 적절한 프롬프트를 작성하는 것이 필요하다고 생각합니다.
LLM을 사용하여 코딩하는 경험은 LLM이 마치 주니어 개발자인 것처럼 대화를 나누면서 개발을 진행할 수 있도록 해줍니다. 기본적인 아키텍처 가이드라인을 제시하고, GPT라는 주니어 개발자에게 자신이 작성한 코드에 대해 “왜" 라는 질문을 던지게 하고, GPT가 작성한 코드에 대해 피드백하면서 구현해나갈 수 있는 것입니다.
Note: 마틴 파울러님은 자신의 글을 번역하고 이를 개인 블로그에 개시하는 것을 전혀 반대하지 않는다고 합니다. 단, 자의적으로 번역한 글에 대해 퀄리티를 보장하지는 않는다는 정책을 펼치고 계십니다. 이번 번역글에 대해 저작권 관련 여러 가지 논란이 있어 하기 Q&A 내용을 첨부해드립니다.
I don’t object to people doing translations and posting them on their site. If you do post a translation, you must include a link to the original article so that readers can see the original should they need to. With a very few exceptions, I won’t link from my site to translations. There are many poor translations out there and I don’t have the time and energy to verify that any translations I link to are of decent quality and to keep checking that these translations aren’t replaced by junk.
© Martin Fowler